How To: Turn-Down or Blend Golf Ferrules

This is a quick How-To guide to Blending or Turning-Down ferrules from home, without the need of specialized bench-top equipment. This process is the the finishing touch to any build that makes an amateur builder look like a professional.
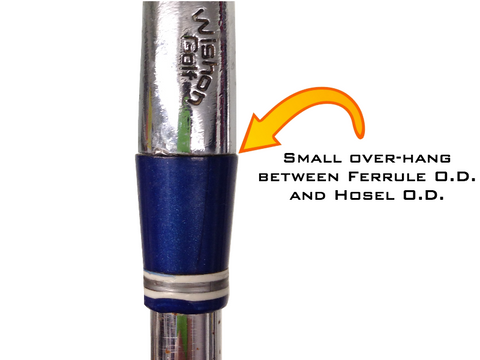
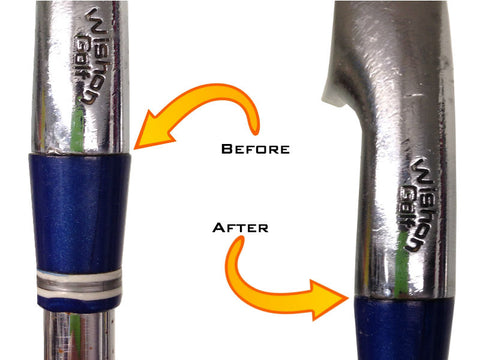
When building or repairing a golf club that requires a ferrule, you may notice that the ferrule's base O.D. (outside diameter) is larger than the club hosel O.D.. Meaning, there is an overhang (or ledge) of the ferrule to the club-hosel. This is only a cosmetic issue and wont affect performance of the club, but looks bad when its not addressed properly. Therefore, you may be required to "Blend" or "Turn-Down" the ferrule so it meets the club flawlessly and seamless.

What you will need:
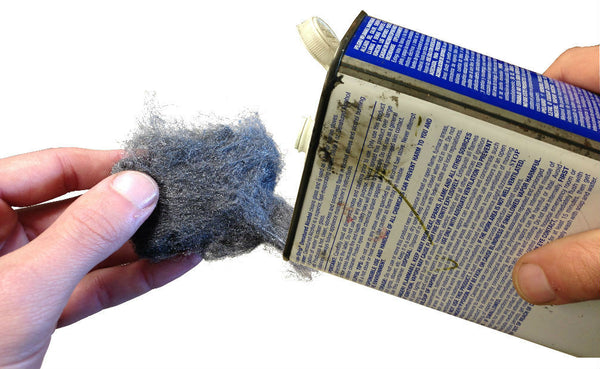
• Gloves (Latex)• Fine Steel Wool• Acetone
Easy Step by Step Guide
WARNING: Use gloves during this process, it can/will be very harmful to your hands and skin.

|
| Step 1 - Using fine steel wool, apply acetone to the wool. (the steel wool is not a sponge, be careful when applying the acetone as it may run straight thru the wool). |
 |
| Step 2 - With the acetone on the steel wool, place onto the ferrule like your "pinching" the ferrule, and spin the club in one direction (do not scrub back-and-fourth). The combination of the acetone and steel wool will shave off and eat at the plastic ferrule, blending it to the hosel. |
NOTE: Every time you repeat this process for another club (i.e., your doing a set of irons, or multiple clubs at once), use a new piece of steel wool. I recommend taking one piece/bunch of wool, and pulling it apart into multiple pieces, resembling a large cotton-ball. Keep using a clean piece of steel-wool for every ferrule you attempt to blend. Do Not reuse the steel wool.

You're Finished!
Now your club-build looks seamless and professional!
Custom Ferrules are available @SpargoGolf! If you don't see a design that fits your style, email us your thoughts of an idea. We'll create a computer generated image of your design for you approval, and will manufacture it to your style and specs!
Leave a comment
Comments will be approved before showing up.


